We’re so happy that you chose to go with Inspire Planner. We hope that it helps simplify your project demands with a simple and easy to use interface. Let’s get started!
Step 1 – Accessing the App
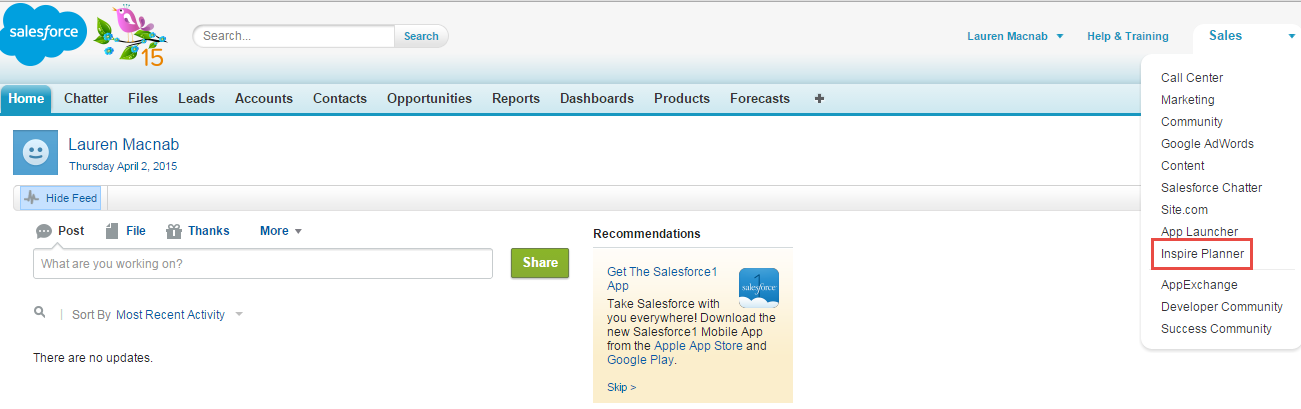
Log into your Salesforce instance and click on the Inspire Planner application from the drop down menu in the top right hand corner of your screen.
Step 2 – Creating your Project
Once you are in the Inspire Planner application it will ask you to create a new project or select from existing projects. As you can see in this instance there are no existing records to select. Click on New.

Step 3 – Project Name & Description
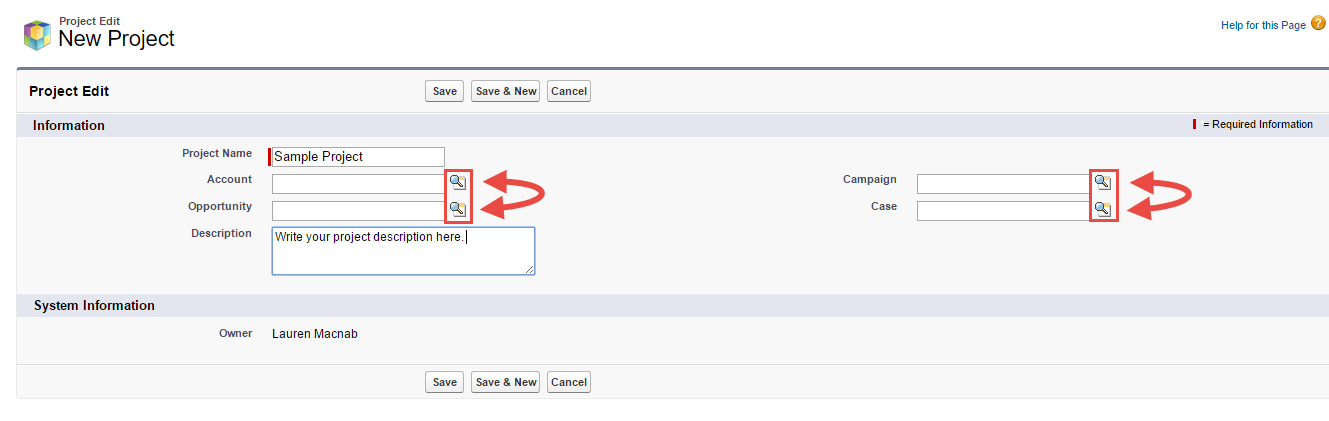
Fill in your project information including Project Name, (and optionally) Account, Opportunity, Description, Campaign and Case.
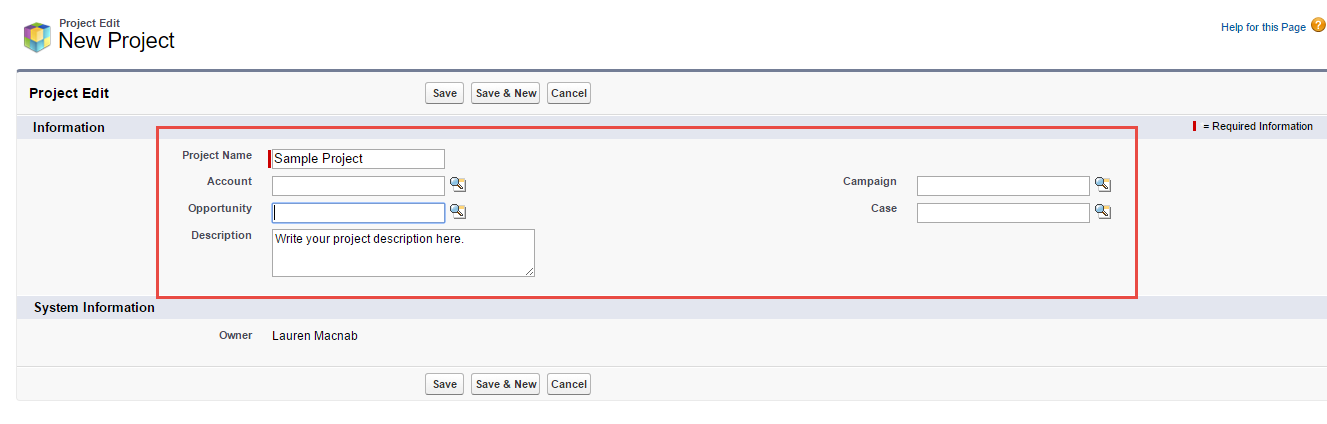
Using the Lookup icon select the Account, Opportunity, Campaign or Case you wish your project to be linked to and provide a brief description of your project. Press Save.
Step 4 – Familiarize Yourself
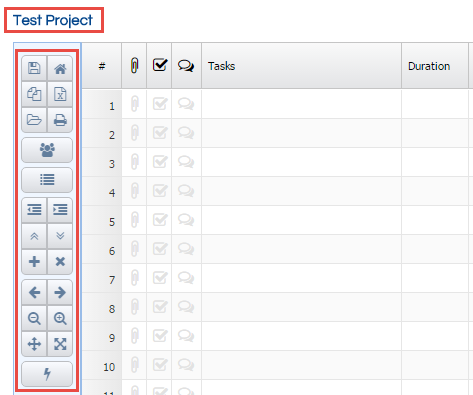
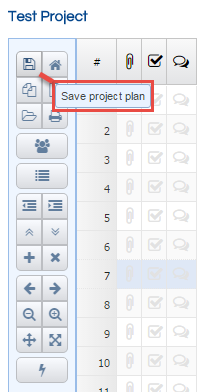
Now you are ready to begin! Familiarize yourself with the user interface. You will find your Project Name in the top left hand corner with a list of your icons below. Unsure what they do? Hover over the icon for a brief description.
Step 5 – Write Your Tasks
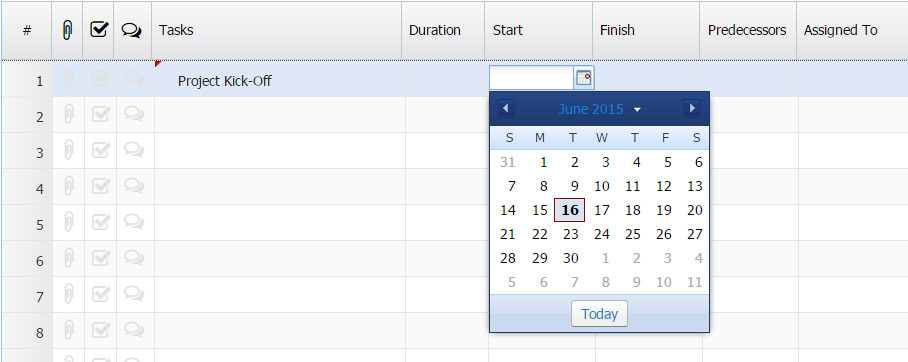
Now that you are familiar with the icons, double click in the Tasks column to write your first task. Write the task name for example, Project Kick-Off.
Step 6 – Organize Your Tasks
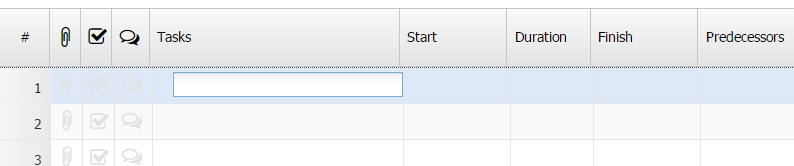
If there are subtasks to a task, use the Indent button to indicate that they fall under one area of the project. In Image 1 below the details for Project Kick-Off have been filled out. The Project Manager would like all of these tasks to be subtasks of Task 1, Project Kick-Off.
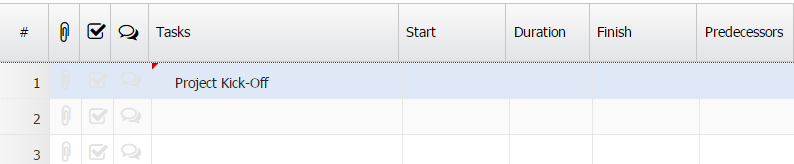
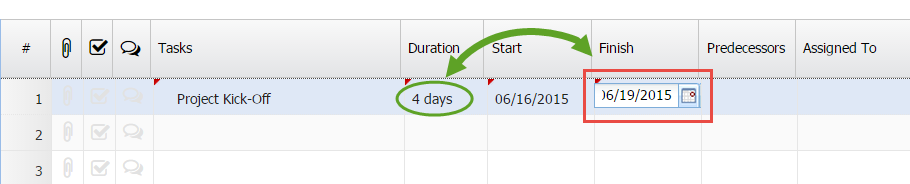
1. Highlight the tasks you wish you indent, to highlight multiple press Ctrl and click on the corresponding tasks. (Image 2)
2. Press the Right Indent button in the quick link bar. 
3. To remove the indent, simply press the Left Indent button. 
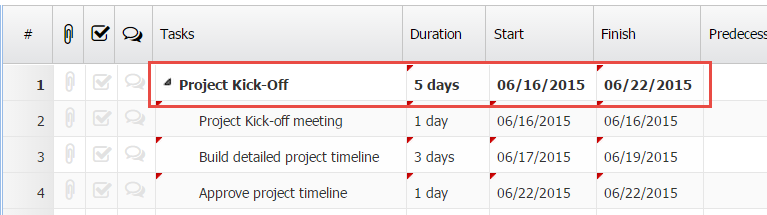
4. Your tasks should look like Image 3, click Save.
Image 1

Image 2

Image 3
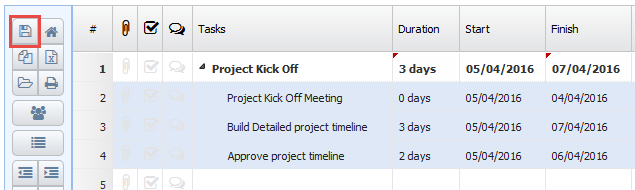
*Once you indent task(s), then you will no longer be able to modify the Duration, Start or Finish dates of the parent task since they become a roll up of the subtasks.
Step 7 – Setting your Start and Finish Dates
Your next step is to set the duration of your task(s). If you are working with a stand-alone task, simply use the Date Finder, by double clicking in the Start column and selecting your date from the calendar view, repeat this process in the Finish column. The Duration will self-adjust.
When working with subtasks the Duration of the principle task will accumulate the combined start to finish dates of the specified subtask(s).
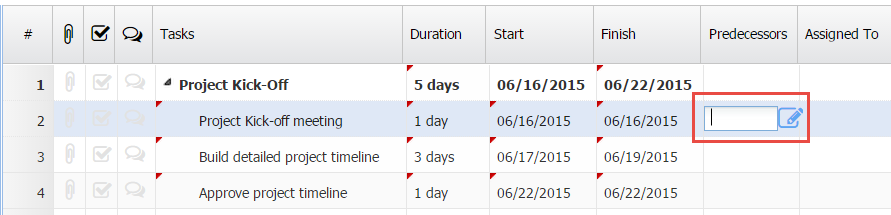
Step 8 – Predecessors
Assign any predecessors that must be completed in order to complete the task(s).
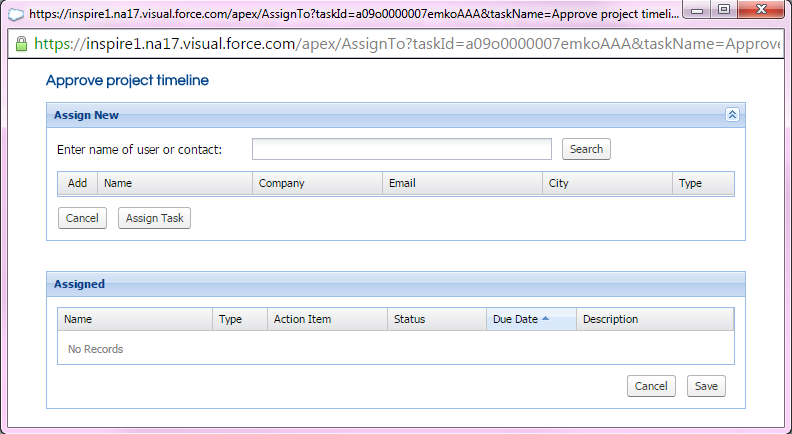
Step 9 – Assigning Tasks
The first time you assign tasks to users double click on the Assigned To cell in the row of the desired Task, and then click the pencil icon.
You will then be asked to search for the user or contact you wish to assign the task. Type their name and press Search. Select the user/contact, then press Assign Task. Press Save.
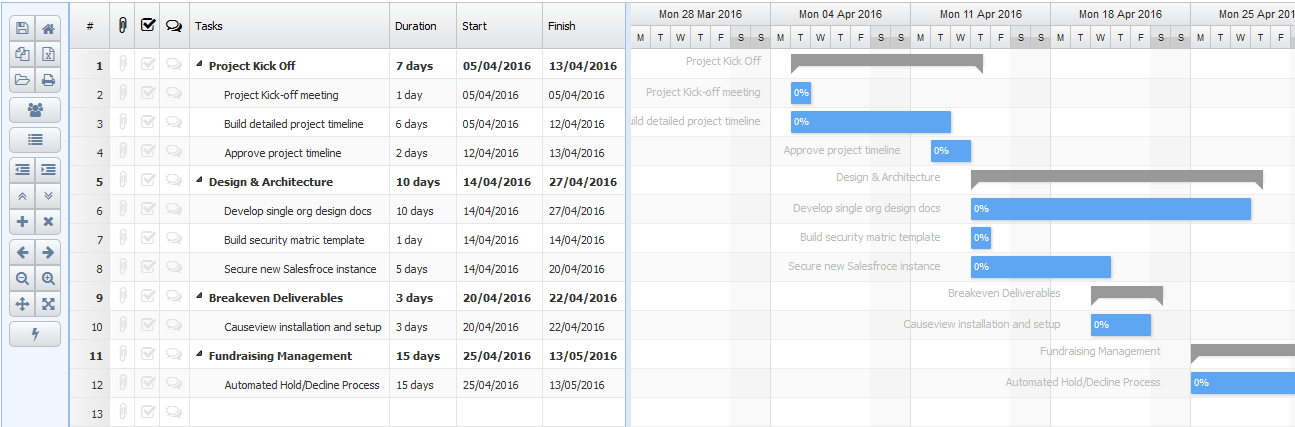
Step 10 – Review Your Project
Review your overall project and Gantt Chart, and you’re ready begin! Make sure to update the status of tasks and percentage complete in order to have an accurate view of the project. Ensure that the appropriate users have been given editing/viewing privileges and off you go!
Your Gantt Chart should look similar to what you see below. Never worked with a Gantt Chart before? Check out the Inspire Help Centre for more resources.
If you have any other questions look at our Inspire Help tab within the Inspire Planner application. You fill find How to Guides, Community Q & A and if your question isn’t answered log a Help Ticket and someone from our Inspire Support Team will get back to you.
Happy project planning!