You've just signed up for Inspire Planner, but need some help understanding where to go? Easy. Below are some quick tips to navigate through Inspire Planner and get the most out of the app to get your project up and running.
1) Finding your project name
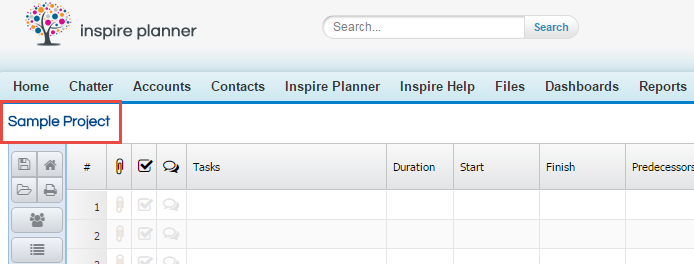
Your project name will be in the top left hand corner of your screen. In this example, you will see the title, Sample Project.
2) The Toolbar
The toolbar is found under your project name, on the left hand side of the screen. These buttons will help organize your Task List and Gantt Chart. If you are unsure about what the the buttons in the toolbar do, simply hover over the button in question and a bried description will appear.
General
At the top of the toolbar you will find the general buttons that relate to the project as a whole. The most important button is the Save project plan button, found on the top left. Press Save frequently and after key information has been inputted into your project. If you exit without saving, Inspire Planner will not save the changes.

 - Save project plan
  - View project detail
 - View all project attachments
  - Print project plan

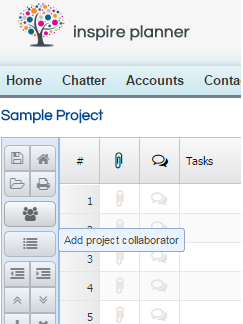
 - Add project collaborator
  - Display all action items
Task List
You will next find buttons that relate to your Task List.

 - Outdent selected task
  - Indent selected task
 - Collapse all tasks
  - Expand all tasks
 - Add selected task
  - Delete selected task
Gantt Chart
Finally, you will find buttons related to your Gantt Chart.
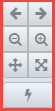
 - Move to previous timespan
  - Move to next timespan
 - Zoom out on timeline
  - Zoom in on timeline
 - Zoom to full timeline
  - View in full screen mode
 - Display project critical path
To learn about your Task List click on, Navigating Inspire Planner - Task List, in the How to Guide's section of Inspire Help.