Now that you know how to attach a file, assign action items and use the Chatter capability we will move on how to make the preassigned columns fit the project plan you are working on.
Below is the column headers that you will see within your project. To recap, the first column, # is the number of the task assigned. The paperclip is for attachments, the checkmark for assigned tasks, and the speech bubble for Chatter. For the remaining columns we will cover how you resize columns, reorder columns, hide and show columns and how to sort your columns.

Resizing Columns
To change the size of your columns, place your cursor over the dividing line between two of your columns. You will see the column become highlighted. Drag either left or right to change the width of the column.

Re-ordering Columns
To reorder your columns, place your cursor over the column header that you wish to move. The column will become blue. Click, hold and drag to the desired location. You will see a blue arrow appear where the column will now be placed and a green check mark.

Sorting Columns
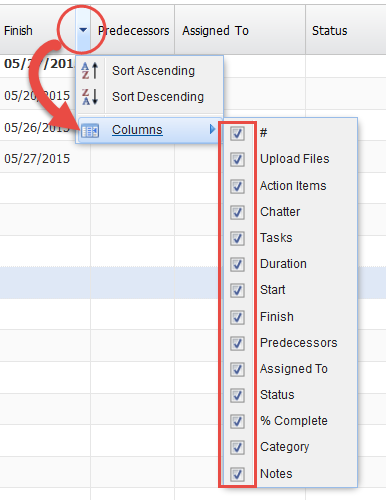
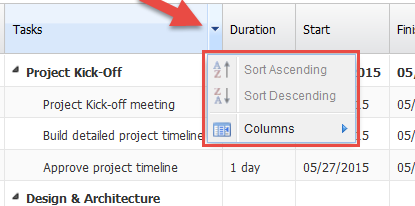
When the column header is highlighted you will also see an arrow appear. When you click on this arrow you can sort the column alphabetically or reverse alphabetically. To have the task list revert to it's original order click the number symbol  .
.
Hiding Columns
To change which columns appear in your project click on the Columns button from the drop down menu. When you uncheck boxes they will no longer be visible in your project. To make the columns viewable simple re-check the boxes.